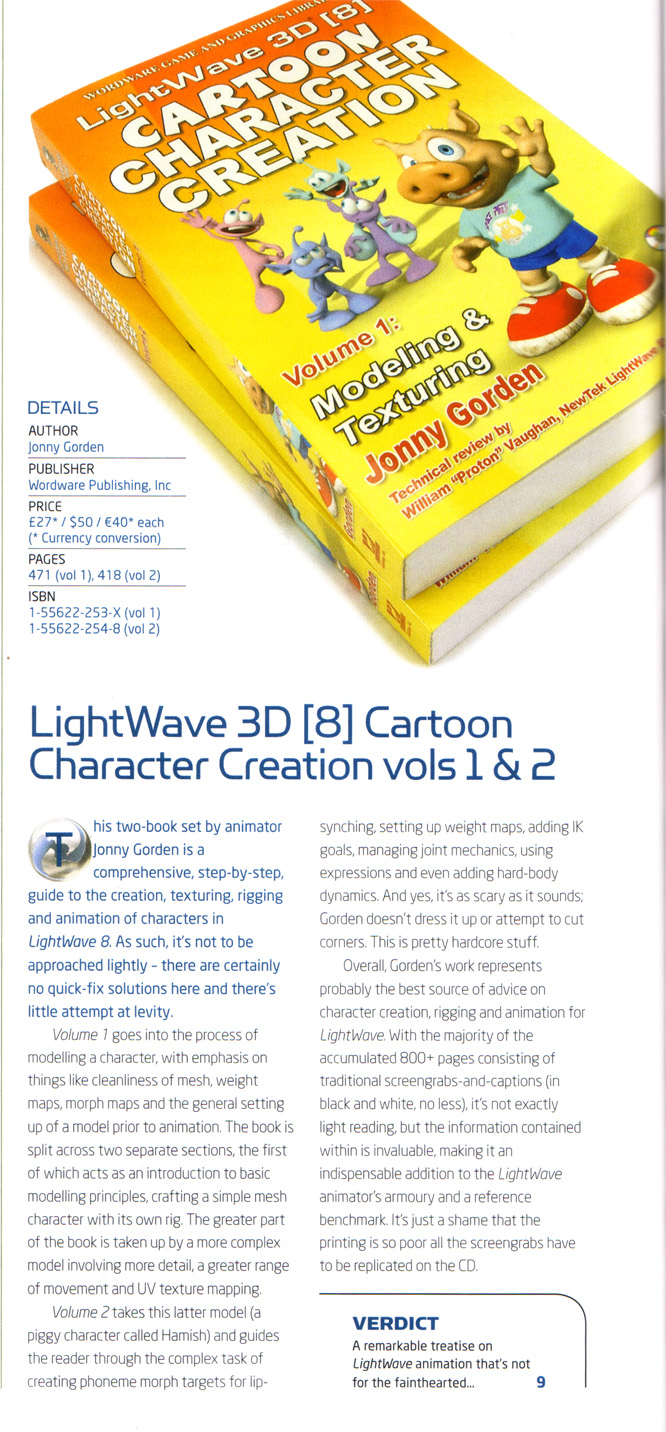
LW8 Cartoon Character Creation - Volumes 1&2 teach proven methods of creating and setting up 3D characters for animation. These books are the most complete, in-depth and accurate resource available for character creation and animation using LightWave 3D.
LW8 CCC Volume 1: Modeling and Texturing
Volume 1: Modeling and Texturing includes both general theory and comprehensive tutorials for every aspect of modeling and texturing 3D characters, the fundamental building blocks of character animation. It also includes the bonus "complete introduction to character creation" featuring an introductory course to creating a character ready for animation from beginning to end, including modeling, surfacing and rigging.
Volume 1: Modeling and Texturing includes:
- Concept design & analysis.
- Subdivision character modeling.
- Complex UV Mapping techniques made easy.
- Surfacing and surface attributes.
- Texturing using gradients and procedural textures.
- Image map creation and application.
LW8 CCC Volume 2: Rigging & Animation
Volume 2: Rigging & Animation includes both general theory and comprehensive tutorials for every aspect of rigging and animating 3D characters. This book describes multiple rigging techniques, advanced and alternate animation controls, using dynamics, and includes a comprehensive explanation of facial animation, overlooked in other books.
Volume 2: Rigging & Animation includes includes:
- Rigging - weight mapping, bone creation, IK and deformations.
- Advanced rigging techniques - expressions, FK/IK blending and more.
- Quadruped rigging.
- Creating morphs for facial animation and lip-sync.
- Animation - using the animation controls, animating with IK and more.
- Facial animation - expressions, lip-sync and advanced morph controls.
- Dynamics for secondary body motion and clothes.
Also included in both books are descriptions of useful third party plug-ins, many of which are used in the tutorials. The accompanying CDs include all the featured third party plug-ins, example files for the tutorials, and all the illustrations in full color.
If you have any questions or suggestions please check the FAQ. If that doesn't provide the answers you need, please feel free to contact me with any questions.
1. Typos and Addendums
2. Updates
3. Commonly Asked Questions
1. Typos and Addendums
Page 1, Files and Folders - Step 1:
The Project Template folder was left off the CD. You can re-create it using the following folder structure:
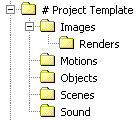
Volume 1
Page 6, Interface - Step 4:
Shortcuts are F8 & F7 respectively
Page 106, Assigning Weights to Skelegons - Step 2:
EyeStretch_LT should be assigned the weight map Eyelid_Base_LT
Page 306, Creating a UV Morph - Step 4:
Morph Map Mixer is a plug-in that was accidently left off the CD for volume 1. It is included on the CD of volume 2 where it is more widely used. You can find Morph Map Mixer at:
Dstorm's Plug-ins
Alternatively you can use Map>Apply Morph, select the Eye.Blink morph and change the value to 80%.
Volume 2
Page 138, Creating the Leg Bones - Step 9:
First turn Parent in Place on, then set the parent of Leg_Upper01_LT to Hip_LT.
Page 280, Additional Controls - Step 2:
Clone Jack_BToe_LT and Jack_FToe_LT, not the ankle controls (as seen in Figure 4.5-17).
Page 340, Figure 5.3-9:
Right: Blink and Lid_Up
2. Updates
Volume 1
Chapter 3.2 - Super Shift
Super Shift was replaced with Multishift in one of the updates. You can use Multishift in exactly the same way as Super shift is described in the book on page 54 step 21 (and other occasions). Select the two polys and select Multishift. Click and drag on the geometry to bevel the polys inwards and upwards. Or you can type in the values from figure 3.2-42 into the Inset and Shift boxes. Either way you will have the same result as in the book.
If the polygons shift seperately instead of together, select the Multishift tool, press "n" for the numeric panel if it's not already open, and tick the group polygons button that's just under the value inputs.
Chapter 6.1 - UV Texture Distortion
SubPatch UV
LightWave 8.2 addressed subPatch distortion with the introduction of subPatch options for UV maps. SubPatching a UV map interpolates the coordinates of the UV map in a similar way to the spline interpolation of the object, minimizing and in many cases eliminating subPatch distortion. A side effect of having subPatched UVs is that Modeler no longer takes into account the subPatched point positions when creating UV maps.
There are a few options available to subPatched UVs:
Linear, Subpatch, Linear Corners, Linear Edges, and Across Discontinuous Edges. These options mainly change how the subPatching deals with discontinuous edges. Through experimentation with these options you can usually come up with a solution that is pretty close to your geometry. I find Linear Corners is the most accurate for the majority of cylindrical or spherical based UV maps.
Another way to minimize subPatch distortion in discontinuous areas of UV maps is to map an extra row of polygons than you require, creating the most accurate interpolation of the UV coordinates. This isn't a very useful solution for the seams of cylindrical or spherical UV maps, but works well for other discontinuous UV edges.
Volume 2
Chapter 4.5 - ProtonJack Rig
The rig format changed slightly from version 8.0 to 8.2 which resulted in the supplied rig file not working correctly. An updated rig file which works for versions 8.2 and later (including v9) can be found here:
ProtonJack Rig Update
3. Commonly Asked Questions
1. Where can I find reviews of these books?
You can find some customer reviews at Amazon:
Volume 1
Volume 2
Here is a review of Volume 1 from CGFocus:
CGFocus Review
Here is a review from 3D World, giving them a whopping 9/10:
3D World Review
2. Are these books still relevant for LightWave 9?
Yes. The rigging and animation tools haven't significantly changed between v8.0 and v9.2.
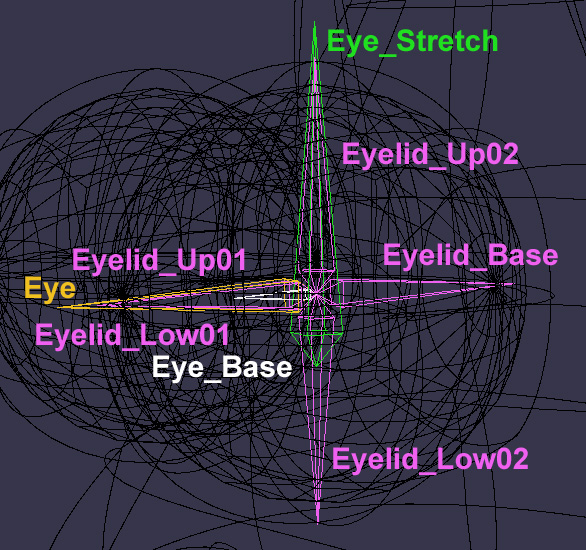
3. I'm having trouble with naming the skelegons for Morfi's Eye.
This picture should help explain the correct names more clearly:
