It seems with the ability to create animation on computer more easily than in the past, and the advent of 3D animation, that an important working relationship has been lost, that of the master and the apprentice.
The way most animation is created these days is that each animator is assigned an entire scene. They animate all the characters in that scene from layout to completion. In this environment one of the biggest battles is dealing with different levels of skill and experience amongst animators. Scenes can be allocated to different animators based on their strengths, but a noticeable difference in the animation quality between scenes is almost inevitable. As animation supervisor I’ve struggled with this in the shows I’ve worked on, and I see it in almost all 3D animated tv and all but the best feature films.
So what can be done to address this problem?
One solution is to re-introduce the traditional master and apprentice relationship. Not only used for animation, the master and apprentice relationship has existed for thousands of years in almost every craft and trade. So why has it recently fallen out of favor for animation? To answer that we must first look at the roles of master and apprentice for animation before computers, when every frame was drawn by hand.
Continue Reading »
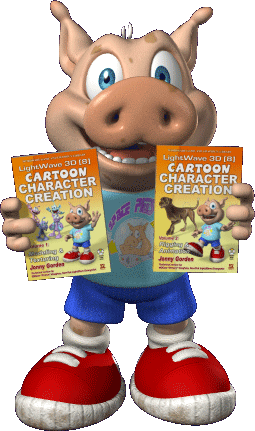 I wrote a couple of books a few years ago: Cartoon Character Creation – Volumes 1 & 2.
I always planned to post some excerpts here, but never got around to it. Last year, working on Chuggington with the fantastic animators at Motion Magic in China, I realized that while I have changed some of the ways I work since writing the books, the core information and methodologies remain the same, and is still very useful information that many animators aren’t aware of.
Since Chuggington is animated using Maya, and those animators were benefiting from this knowledge, it further impressed upon me how universal the information is. I was always disappointed that the books were tied to LightWave 3D 8 since so much of the information applied to 3D characters and animation in general, regardless of which software was being used. I guess this is also my chance to share that information with a wider audience.
Continuing from part 1, I’ll discuss each of the eye morphs.
Note: In LightWave, morph targets are called ‘Endomorphs’, in Maya they’re called ‘Blend Shapes’ and in Blender they’re known as ‘Shape keys’. For simplicity here I’ll just refer to them as ‘Morphs’.
Eye Morphs
The eye morphs include the motion and expression of the eyelids and eyebrows.
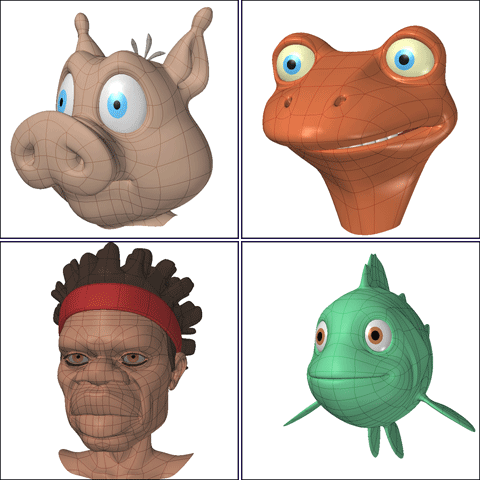
Before we move on to the morphs, let’s take a look at the base models for the characters used in the following examples.
I’ve included a range of characters for the examples. Each character has slightly different requirements, so you can see the differences for each morph. For the eye morphs I’ve included Taylor (top-right, Taylor appears courtesy of Live Bait Productions) to show examples of the eye morphs for a character without any eyebrows.
When you’re creating your base character, try to make its expression as neutral as possible. Often the concept sketches for a character show it smiling or showing some sort of emotion. If you model emotion into the base character it makes creating and animating the facial features much more difficult, so remember to model it in a neutral expression, allowing the morphs and animation to do the job of expressing emotion.
Continue Reading »
 In an interview with the West Australian, Keith Chapman (Bob the Builder, Fifi and the Flowertots, Roary the Racing Car) says of Little Charley Bear:
“this pilot came in which was one of the most impressive things I’d ever seen and I just fell in love with Charley”.
I’d assumed Chapman Entertainment liked the pilot, as they picked it up to produce the show, but for Chapman to specifically say that about the pilot that I designed and animated is a great compliment.
The first 26 episodes have now aired here in Australia on ABC2. Charley was the only character in the pilot so it’s nice to see he’s got some new friends. I have noticed there are a few problems that I resolved when working on the pilot that have managed to slip back into the episodes, such as Charley being very washed out, posing/motion problems, and some other issues. Making the transitions between Charley’s real world and imaginary world seamless would also do wonders. If anyone from the production is reading this and wants to know how I was able to solve those problems, please send me an email. I’d love to help.
In Australia you can see repeats of Little Charley Bear on ABC2 at 1:20 and 6:15 every day.
 I wrote a couple of books a few years ago: Cartoon Character Creation – Volumes 1 & 2.
I always planned to post some excerpts here, but never got around to it. Last year, working on Chuggington with the fantastic animators at Motion Magic in China, I realized that while I have changed some of the ways I work since writing the books, the core information and methodologies remain the same, and is still very useful information that many animators aren’t aware of.
Since Chuggington is animated using Maya, and those animators were benefiting from this knowledge, it further impressed upon me how universal the information is. I was always disappointed that the books were tied to LightWave 3D 8 since so much of the information applied to 3D characters and animation in general, regardless of which software was being used. I guess this is also my chance to share that information with a wider audience.
I’m going to jump straight to one of my favorite sections of the books, and one of the most valuable ones, Morphs for Facial Animation.
Note: In LightWave, morph targets are called ‘Endomorphs’, in Maya they’re called ‘Blend Shapes’ and in Blender they’re known as ‘Shape keys’. For simplicity here I’ll just refer to them as ‘Morphs’.
Morphs for Facial Animation
Morphs are the ideal way to create facial expressions for cartoon characters. While using morphs is not the only way to create facial animation, it is the easiest method for both creating and animating facial expressions. You have more flexibility using morphs than other techniques, such as using bones, as you have full control over the position of every point in the model for each morph.
LightWave’s implementation of morphs, called endomorphs, is useful in that it records new point positions for each point included in the morph in a vertex map. This means that all your morphs are held within the model itself instead of having a different model file for each morph as with Maya. Other benefits of endomorphs are that you can adjust point positions in the base model at any time and have those changes automatically propagate through the morphs. You can add or remove geometry and the morphs update appropriately, and you can create multiple characters from a single base character without having to create new morphs for each one, as they just inherit the morphs from the base character (although they will likely need some adjustments).
The drawback to morphs is that they are linear. This means that the points move from A to B in a straight line. While it’s rarely noticeable when the morphs are mixed together and moving fluidly, it can be noticed in certain situations. The eyelids are one of the most common areas you might notice this, which is why for some characters it’s useful to use bones instead of morphs, or a combination of the two, for some things (later in the book I explain some ways to overcome the linear aspect of morphs when it becomes a problem).
The most important resource for creating facial expressions is a mirror. Make sure you have one next to you at all times when creating the morphs. When you start to create a new morph, make the same expression while looking in the mirror to see what your face looks like and how it changes when you move back and forth from a neutral expression to the required expression. By doing this you have a much better idea of what you need to change in your model to create the same expression. Make sure you check your own face fairly regularly during the creation of the morph to make sure you haven’t forgotten anything.
Continue Reading »
To celebrate Halloween, I thought I’d show you a little anim I created this time last year.
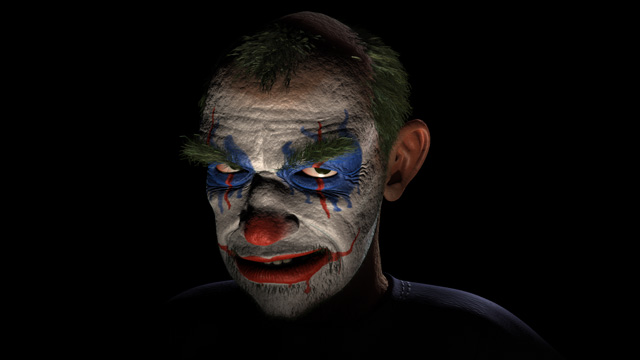
A few people have asked where my Facebook photo (above) is from, and this is it. The clown was created (modified from an existing character I had made) and this animation completed in 2 days as a quick test. The audio is from a sample video from Hollow3D.
Check it out after the jump (hehe I’ve always wanted to say that…).
Continue Reading »
I just came across this sketch I drew last year, and thought I’d post it. I had been working on some car designs for a show I’m creating when I watched the Top Gear Botswana special. In the show, Richard Hammond bought a 1964 Opel Kadett which he ended up naming Oliver (I also had a kitten named Oliver so the name is kinda special to me too). The character that Hammond created for the car set my imagination going and I created this little design:

Edit: I just realized not everyone will know what the original Oliver looks like so here’s a couple of pics. Oliver in Botswana (driven by the Stig) and the restored Oliver with Richard Hammond.


If you haven’t already seen it, you can catch the Top Gear Botswana special on the season 10 DVD…

I first wrote this article in 2001 as a partner to How to Determine an Hourly Rate. Since then it’s been published in books, magazines, and numerous times on the web. Since most of the sites it was published on have long since vanished I thought I’d post it here.
Download the Excel file used in this article.
Part 1 – Why Schedule?
One of the most important things about being in business is proper scheduling. Whether you’re working for yourself or part of a team, knowing how long things take, and when tasks will be complete are vital to a productive environment.
One question I hear asked quite often is how long a particlular task should take. The answer is quite simply just 5 minutes a day. The question can sometimes be valid if the task is something that the person hasn’t done before. The trouble is that everyone works at a different pace, and everyone has differing opinions about how long a task might take.
By following the tips in this article, in a very short time you will be able to estimate much more accurately how long a particular task will take you. This will benefit in quoting for jobs, organising your workflow, and enhance productivity.
Continue Reading »
I first wrote this article in 2001. Since then it’s been published in books, magazines, and numerous times on the web. Since most of the sites it was published on have long since vanished I thought I’d post it here, as it seems that it’s more relevant now than ever.
Step 1 – Preparation
So you’d like to be your own boss, or maybe you are picking up some contract jobs while looking for full-time work. Either way one of the most difficult things can be knowing how much to quote a client.
Many of your contemporaries are hesitant to advertise their rates, in case they are undercut in a bid, and potential clients would undermine their ability to negotiate if they were to advertise what they are prepared to pay. So how do you find that magic figure that is low enough to get work, but not so low that you can’t pay the rent? High enough to compensate your time appropriately, but not so high that you price yourself out of the bid?
Continue Reading »
You may be wondering what all this talk of cakes is all about, and why is it on a site primarily about animation? And to be honest you’d be right to ask…
Let me start by saying my blog will continue to be a place where I answer peoples questions, whatever those questions are about. Lately I’ve been asked quite a few questions about making cakes, and so that’s what I’ve been posting about. This blog, as well as me posting what I’m interested in at the time, will also be somewhat reactionary, allowing me to respond to pretty much anything people tell me they’re interested in, if I have something to say about it.
I’m not really at liberty to discuss or show much of the animation work I’m doing just at the moment, but that will soon change. So if you’re waiting for more of that sort of thing then please be patient. It won’t be too long now.
Speaking of which, you may have noticed I’ve taken down the Charley Bear pages temporarily. Don’t worry, we’re just doing some re-tooling, a few adjustments, before re-announcing it to the world. There is a lot happening for Charley at the moment, and all will be revealed very soon.
Soon I will be releasing some video and written LightWave 3D training to bridge the gap between what was and what is now. LightWave has recently had some additions that are definitely worth talking about.
I’ve also recently revisited X-Men: ROA, and have some cool stuff to share. But I’ll leave that for another entry.
So let me finish by saying, thanks for your interest, and please let me know at any time if there’s something you particularly want to know, or topics you’re especially interested in. I’m happy to talk about what you want me to talk about.


